SW Measurement Studio

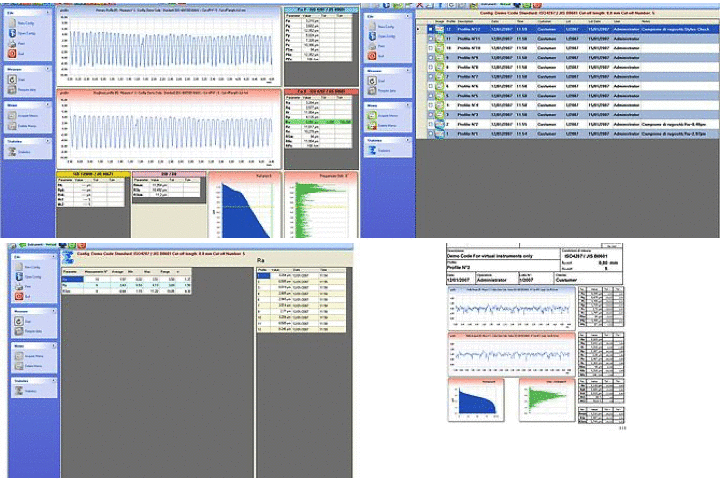
Measurement Studio program was conceived as external interface for the elaboration of data measured by portable SM roughness testers, and specifically, it can be connected to: RT10, RT10G, RTP80 and RT90. Thanks to the use of simple and clear icons, the operator is assisted in using all storing, checking and statistic functions on the measured data.
The main functions of Measurement Studio software are:
- Possibility to remotely launch the measurement through PC and request data from the roughness tester.
- Download the stored data in the instrument’s internal memory and file it in the PC
- Organize the measurements within a database, according to codes, measurement sessions, operators.
- Preconfigure a specific set of measurement parameters for each code, in order to remotely set-up the instrument according to the piece to be measured, thus saving measurement set-ups, tolerances and system’s variables.
- Visualize the measurement results in graphs or tables, selecting the parameters and graphs to check the roughness profile, waviness, primary profile, bearing capacity curve and main waviness, with a simple click.
- Perform statistical analyses on a specific set of measurements or on the entire batch, to identify the statistical analyses of that value, on each single roughness parameter.
- Print the measurement reports, roughness, waviness, primary profile, bearing capacity curve graphs, and statistical analysis reports in A4 format.
All reports can be personalized and edited, to ensure utmost flexibility.
Two versions of the Measurement Studio software are available:
- Measurement Studio Lite version (code 1.403) that allows to connect to roughness testers RT10 and RT10G.
- - Measurement Studio Full version (code 1.404) that allows to connect to all manufactured roughness testers (RT10- RT10G - RT90 – RTP80) and, compared to the Lite version, it allows to perform analyses on parameters and waviness profile (if it can be calculated) and the parameters indicated in VDA 2007 standard, determining the main waviness.
SW Circom

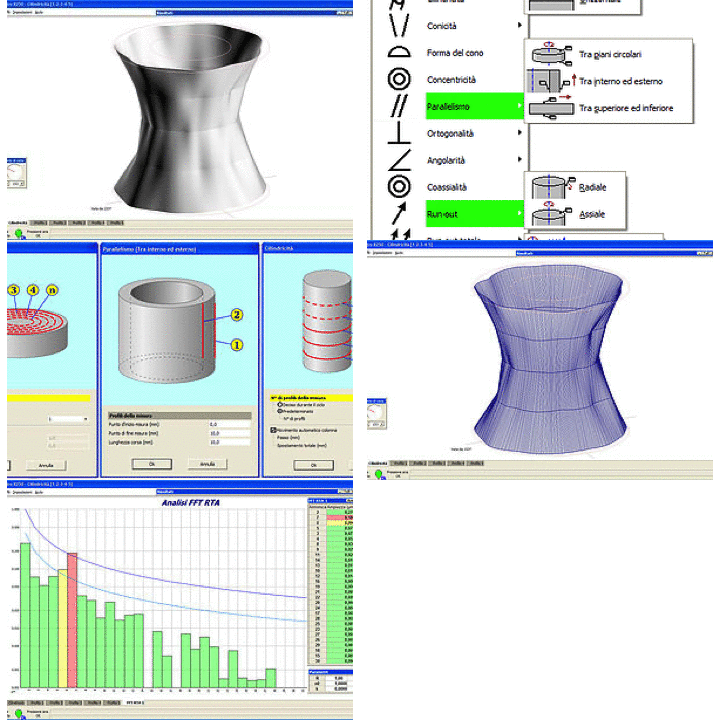
CIRCOM software is a program developed internally in order to characterize surfaces generated by flat rotation and relative geometric tolerances, such as: roundness, concentricity, planarity, coaxiality.
Circom software is installed on all roundness testers manufactured and also on the retrofits carried out on machinery built by other manufacturers, which are updated in terms of electronics and software. The program is extremely flexible since it is able to manage the simplest roundness testers with a single controlled axis, up to the most complex ones equipped with three motorized measurement axes (plate C, column Z and arm R).
The calculated parameters are: roundness, planarity, linearity, cylindricity, conicity, cone shape, concentricity, parallelism, orthogonality, angularity, run-out, total run out, thickness variation, diameter; it is also possible to analyse harmonics through FFT algorithm on roundness and planarity measures.
Gaps can be calculated, thus part of the acquired data can be automatically or manually eliminated. Circom software works with metric and English units.
There are two types of filter inside the software; for polar measurements, filters based on harmonics are used, which are: 1÷15, 1÷50, 1÷150, 1÷500 and 15÷500 ripples/revolution. While for linearity measurements, the filters used are the following: 0.25 mm , 0.8 mm , 2.5 mm and 8 mm. The two filters can be implemented through 2CR filter or the most modern Gaussiano filter
All reference calculation methods are available: for circumference LSC, MZC, MIC and MCC. For plane: LSP, MZP, MIP and MSP. For straight line: LSL, MZL, MIL and MSL.
For planarity and parallelism, it is possible to view the results in plan view and also in 3D.
For cylindricity, various display methods can be chosen: plan view, 3D with only profiles, cage, or shaded solid. All 3D views can be rotated as required.
A guided procedure allows the operator to centre and level the piece being measured.
The standard measuring cycles are directly displayed on the video. With these cycles, the piece positioning and profile acquisition phases are already set-up and the operator just needs to confirm to go to the following phase and quickly obtain the results.
For checks in series or to perform more complex calculations, it is possible to create programmable measurement cycles in order to simplify and speed up use.
SW Profile Studio

Profile Studio Software is the latest program conceived for the characterization of micro and macro aspects of surfaces, and more in details, it allows to analyse the surface roughness and geometries of the pieces being tested.
Thanks to the modern conception and development with the latest implementation platforms such as framework .NET, it is easy to use and allows to train technicians within a short time.
The philosophy that led to the development of this program is simple ‘’All I need must be visible’’, thus eliminating the old concept of operations from control panel or articulated inside hidden menus.
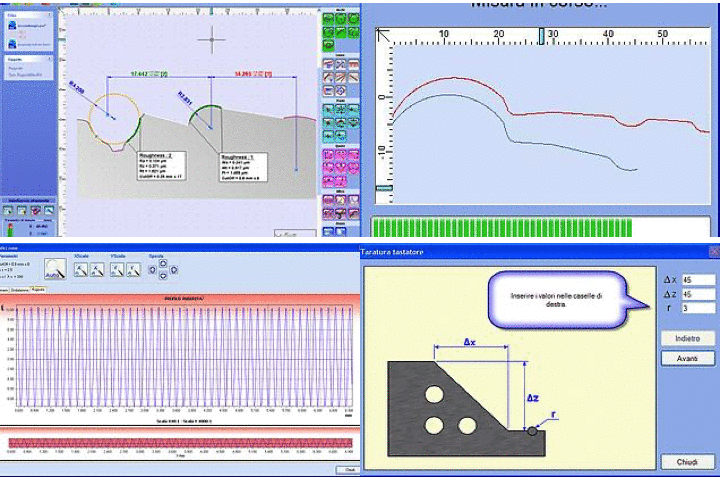
The functions required for the characterization of the profile are all grouped in the right toolbar (arcs, lines, points, sizes) and divided into categories, each of different colour; on the left, the tree chart of already acquired profiles and the interface to control the instrument are shown on the left (tip's position, measurement, calibration set-up).
The CAD is highly advanced: all items are dynamic and can be edited after being input.
Through the Best Fit function, an arc or line can be designed on the profile with a simple click, because the minimum error area where to input it, is recognized automatically. Thanks to the self-comparing function, it is possible to reconstruct all dimensions and dimensional tolerances of a reference profile on a new profile, thus saving a considerable amount of time for checking the pieces of a same batch!
For more complex pieces, Profile Studio software allows to execute measurement cycles and therefore, obstacles are automatically overcome (grooves, shouldered parts), and the profile is reconstructed at the end of the measurement.
New dimensions and roughness analyses can be input on the same profile and displayed on the same screen, in order to allow the operator to carry out a complete analysis of the piece, with one single measurement.
The database featured in the Profile Studio software, allows to store measurements in an orderly fashion, ensuring traceability of the single piece through the code and production batch. Moreover, it is possible to perform statistical analyses on the data uploaded in the database, calculating statistic parameters like standard deviation, mean value, maximum and minimum value, and to visualize the distribution and value trend graph.
The roughness parameters are elaborated according to the most recent standards like ISO 4287, ISO 13565-1 and -2, ISO 12085, VDA 2007 for a total of 70 parameters calculated.
